Making home improvements can get pretty costly so it’s great when you come across a DIY job that will improve your home’s aesthetic without costing the earth! One practical and affordable way is to update your flush mount ceiling light; the great news is you can do it yourself.
Lighting is often a job for an electrician but not in the case of updating a light fitting. With that in mind, though, you’ll still want to ensure you’re working safely. Read this useful how-to guide for a safe (but simple) way to install your flush mount light.
What Will I Need?
Before you get started, make sure you have all the equipment you need to complete your lighting installation. The items you’ll need are as follows:
- Flathead Screwdriver
- Phillips Screwdriver
- Wrench
- Replacement light fitting with fixings. If you want to know how big a flush mount light should be, aim for around 13 inches if your ceiling is 8 feet or lower.
If you have an electric screwdriver, this can help speed the process up a little, but it isn’t essential.
Step-by-Step: How to Install a Ceiling Flush Mount Lighting Fixture
1. Switch Off the Power
Before you get started, make sure you have all the equipment you need to complete your lighting installation. The items you’ll need are as follows:
- Flathead Screwdriver
- Phillips Screwdriver
- Wrench
- Replacement light fitting with fixings. If you want to know how big a flush mount light should be, aim for around 13 inches if your ceiling is 8 feet or lower.
If you have an electric screwdriver, this can help speed the process up a little, but it isn’t essential.
2. Remove the Old Ceiling Light
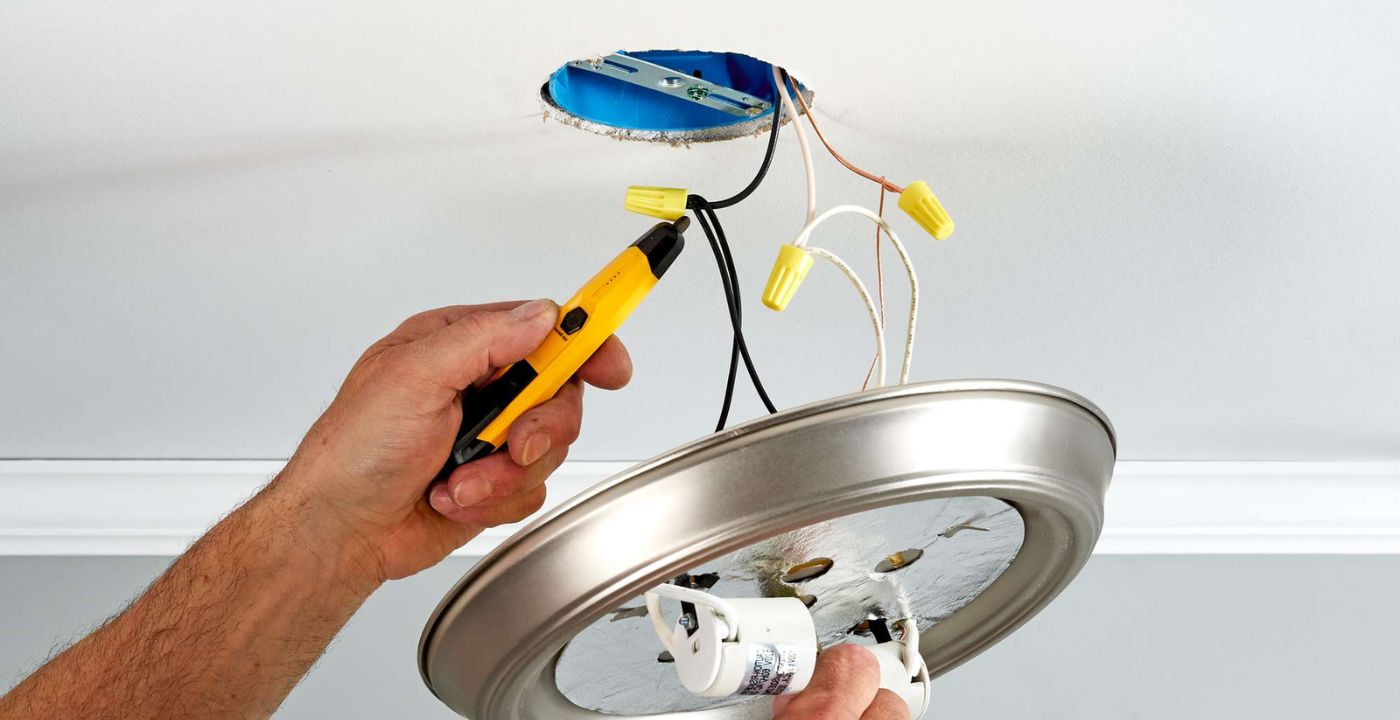
Now that the power is off, you’ll want to look at how to remove the old flush mount ceiling light. Firstly, unscrew the cover, then detach it from the ceiling. You’ll then want to disconnect the wires that are inside the fixture.
To do this, remove the screws that hold the light to the ceiling plate and lower it by 2-3 inches. Inside the ceiling, there will be a box with thick wires (usually white and black), simply pull them out, unscrew the wire nuts, then untwist the wires to remove. Finally, there will be a third bare wire, known as the ground or earth wire, which will also need to be unwound.
Note: Some fixtures, if they’re particularly old, won’t have the third wire.
Now that you’ve worked out how to remove the flush mount light, place it to one side and remove the old base plate. Now, all that should remain is an open box with wires hanging down.
3. Wiring the Flush Mount Ceiling Light
Next, you’ll need to connect the wires. You may find it easier to have someone on hand to hold the light fixture whilst you do this.
Consult the user manual to see how the light attaches to the box. It is most likely to be with screws or via a central post, but whichever it is, keep the parts to hand for ease.
Use your assistant to hold the fixture 2-3 inches away from the ceiling. Connect the wires to the exposed copper ends of the black and white wires in the ceiling. Twist them together securely and cap with a wire nut.
Next, screw the base plate of your new light fitting on to the post in the ceiling, making sure that it’s sat flush. Now it’s time to connect the wires:
- Connect the white wire from the light to the same-coloured wire in the ceiling box and push them in.
- Connect the black wire from the lighting fixture to the same-coloured wire in the ceiling box and push them in.
- Connect the ground wire from your light fitting to the one in the ceiling box and push them in. If you find that no ground wire is present, wrap the light fixtures around the back plate screw and tighten it to secure.
Once you’ve completed the above, ensure all wires are inside the ceiling box.
4. Check the Light Works
Before putting on the cover, you’ll want to make sure that the light works, so screw in a bulb and return to your circuit box to turn the power on. If your light doesn’t turn on, you will want to check that the wiring connections were correctly fitted.
Remember to turn the power back off at the circuit box before reassessing the wiring connections.
Once you’re confident that the light turns on, then you can finish off by attaching the cover to the ceiling.
Recap: How to Replace a Flush Mount Ceiling Light
As you can see from the above, it’s easy to fit a ceiling flush light! Here’s a quick checklist to ensure you’ve completed each step.
- Turn off the power at the circuit breaker box
- Remove the old light fitting and disconnect the wires
- Connect the new wires to the ceiling box
- Switch the power back on
- Check the light works
- Attach the cover
Remember, though, that if you’re ever unsure, then the best thing to do is to consult an electrician who can advise you on your installation!
Bulb Type
Often a high-usage source of illumination, flush mount ceiling lights can be used for ambient, task or accent lighting. When you come to install your flush mount ceiling light, LED bulbs are best as these bulbs are bright, energy efficient, and although their initial outlay is often more expensive than other types – fluorescent bulbs, for instance – the length of time they last make them highly cost-efficient in the longer term.
If the idea of bright lighting is off-putting, then don’t worry, because typically a flush mount ceiling light will come with a diffuser to reduce the harshness that a more exposed LED bulb can produce. You could also consider standard A-type or spiral-shaped bulbs. Don’t forget, when you want to change the bulb in your flush mount ceiling light, turn off the power at the mains!
Summary
Installing flush-mount ceiling lights is an easy DIY job that can instantly transform a room. This guide covers everything from installing flush-mount LED lights, taking off a flush mount ceiling light, and even how to wire it in.
On the rare chance you have recessed and can lights in a vaulted ceiling, it might also be worth reading our guide on installing them as well..
Otherwise, sit back and enjoy the glow-up your new lights provide.